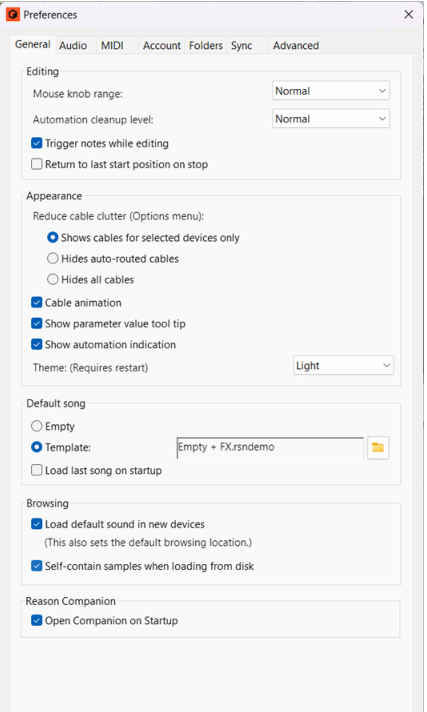
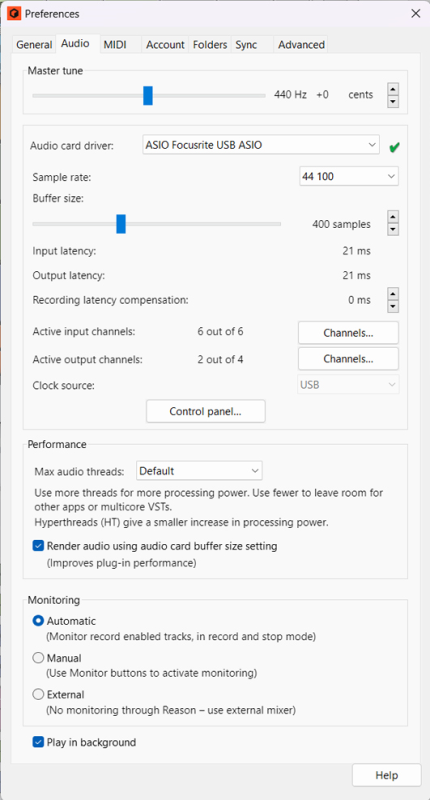
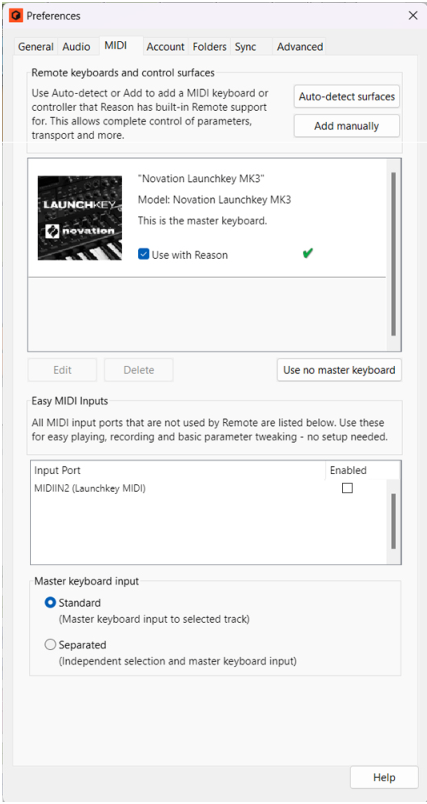
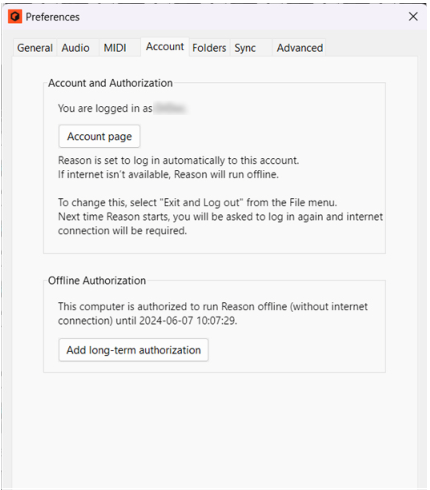
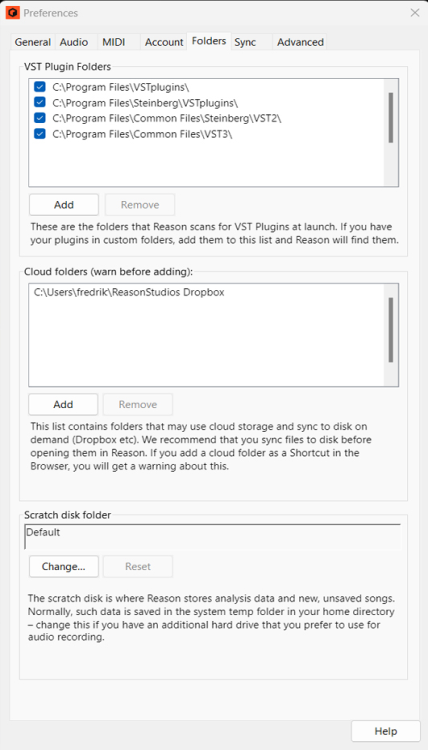
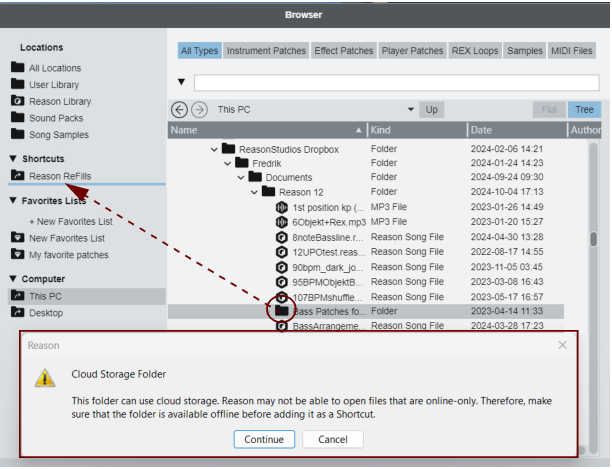
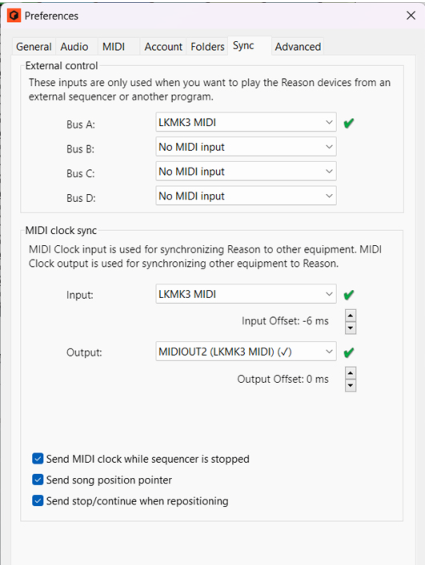
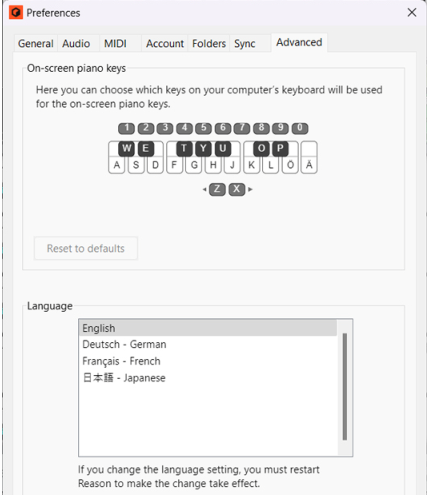
This menu item opens up the Preferences dialog. See “Preferences – General”, “Preferences – Audio”, “Preferences – MIDI”, “Preferences – Account”, “Preferences – Folders”, “Preferences – Sync” and “Preferences – Advanced” for detailed descriptions about the functions and settings in this dialog.
#New
When you select this, a new song appears. The exact contents of this song is determined by your Preferences settings (see “Default song”).
You can then save your song with a new name. See “Creating a new Song from a Template” for more details.
|
|
See “Opening a Reason Song” for more details.
|
|
See “Opening a Reason Demo Song” for more information.
#Save
|
•
|
This saves the active song document to disc. A standard Save As dialog appears requesting you to enter a file name and specify a location for the file on disk. The “Save As” command will also automatically optimize the song file size when applicable (see “Save and Optimize”).
|
|
See “Saving and optimizing a Song” for more details.
See “Including Song Information” for information.
See “About Self-Contained Songs” for more information.
See “Importing audio to the sequencer” for more information.
See “Importing Standard MIDI Files” for more information.
See “Exporting Standard MIDI Files” for more information.
See “Exporting Songs or parts of Songs” for more information.
See “Bouncing Mixer Channels” for information on how to bounce mixer channels.
#Undo
See “Undo and Redo” for more detailed information.
#Redo
See “Undo and Redo” for more detailed information.
|
|
|
|
|
|
|
|
|
|
This will select all devices within the selected device’s Device Group. See “About selecting all devices in a Device Group”.
This function should be used if you want to rearrange devices, channel strips or sequencer tracks according to the order of the current selection. For example, if you want to rearrange the rack devices according to the current sequencer track order, you can select all sequencer tracks and then choose “Sort Selected Device Groups” to rearrange the rack devices. See “About the “Sort Selected Device Groups” function” for more examples.
See “The Combinator” for more details.
|
•
|
|
•
|
|
•
|
This allows you to create, and automatically route, one or several selected Main Mixer channel strips to a new or existing Output Bus for sub-mixing purposes. See “Creating an Output Bus”.
This allows you to create a parallel mixer channel for parallel processing purposes. See “Creating Parallel Channels”.
This disconnects and removes all Insert FX devices of a selected Mix Channel or Audio Track device in the rack, or of a selected channel in the Main Mixer. See “Deleting Insert effects” for more details.
REX files are music loops created in the ReCycle program or when editing audio clips inline in Reason (see “Bounce Clip to REX Loop”). The NN19 and NN-XT let you load REX files either as complete patches or individual REX slices as separate samples. The NN-Nano lets you load separate slices from REX files as individual samples.
|
3.
|
|
|
If the zone contained a sample prior to loading, this will be replaced, both in the zone and in the sample memory, unless the sample was also used by another key zone.
|
At least one of the zones must have a partial velocity range (see “Setting crossfading for a Zone”).
This function inserts an empty area between the locators in the main sequencer. All events after the left locator are moved to the right to “make room” for the inserted area. See “Inserting bars” for more information.
This function removes all material between the locators in the main sequencer. All events after the right locator are moved to the left to “fill out” the gap after the removed section. See “Removing bars” for more information.
This opens the selected clip(s) in Edit mode in the sequencer. If multiple note clips are selected, they are opened for editing in Multi Lanes mode, see “Multi Lanes editing”.
The Bounce in Place function lets you bounce the sound generated from playing back note or audio clips, with any insert effects and channel strip coloration - but without Send FX and Master Section settings - to a new audio clip on a new audio track. See “Bounce in Place”.
It’s possible to bounce Audio Clips to new Song Samples. You could then edit the samples in the Edit Sample window and then load into a sampler device for playback. See “Bounce Clip(s) to New Sample(s)”.
This function allows you to export a selected audio clip as a WAV or AIFF file to disk. See “The “Bounce Clip to Disk” function”.
This function allows you to export the recording of a selected audio clip to an additional Comp Row. See “Bounce Clip(s) to New Recording(s)”.
This lets you bounce an open Single Take audio clip to a Rex file. The Rex file ends up on the Song Samples tab in the Browser. See “Bounce Clip to REX Loop”.
It’s possible to convert Single Take audio clips to note clips. This is especially useful for monophonic audio that can be opened in Pitch Edit mode. See “Bouncing audio to MIDI notes”.
This function allows you to choose which Stretch and Transpose Type to use for a selected Audio Clip. See “Opening audio clips for editing” for more information.
This lets you correct pitches of selected notes, or of all notes in an audio clip in Pitch Edit mode. See “Correcting pitches”.
This lets you reset the pitches of selected notes, or of all notes in an audio clip in Pitch Edit mode. See “Resetting pitches”.
This lets you split an open Single Take audio clip at the selected Slice Markers, and thus create several separate audio clips out of a bigger one. See “Split at Slices”.
This lets you split an open audio clip in Pitch Edit mode at the selected notes, and thus create several separate audio clips out of a bigger one. See “Splitting the clip at notes”.
This lets you undo all Slice Marker edits you made in an open Single Take audio clip and revert to the clip the way it was before you edited it. See “Revert All Slices”.
This lets you “undo” all edits you have made in Pitch Edit mode (similar to the “Revert Slices” function in Slice Edit mode). See “Reverting all notes”.
This function lets you decide if a selected audio clip should stretch and follow tempo changes in the song. When disabled, the audio clip doesn’t follow the song tempo. When enabled, the audio clip is stretched and follows the song tempo of the sequencer. See “About tempo changes and tempo automation of audio tracks”.
This function deletes all recordings that are not used in the selected clip - or anywhere else in the song. By using this function, the file size of the song can be reduced. See “Delete Unused Recordings”.
This function increases the overall audio level of selected Audio Clip(s) so that the loudest peak touches 0 dB. See “Normalizing audio clips”.
This function reverses selected Clip(s) and plays them back backwards, from the end to the start. See “Reverse” for information about reversing note and automation clips and “Reversing audio clips” for information about audio clips.
|
2.
|
|
|
|
•
|
Selecting “Crop Events To Clips” removes all such outside events from the selected clip(s). If tracks are selected in the track list, this function is performed on all clips on the selected track(s). See “About masked recordings and events” for more details.
See “Naming clips” for more information.
Allows you to select a color for the selected clip(s). See “Coloring clips” for more details.
See “About alien clips” for more information.
This lets you quantize note clips and Single Take audio clips, as well as selected notes in note clips, selected Slices in Single Take audio clips and selected notes in audio clips in Pitch Edit mode. See “Quantizing audio” and “Quantize”.
This lets you crossfade two partly overlapping audio clips. See “Crossfading audio clips” for more details.
This command is available when a sample is selected in the Song Samples location. Selecting Edit Sample opens the sample in the Edit Sample window. See “Editing samples” for more information.
This command is available when one or several samples are selected in the Song Samples location. Select this to create a duplicate of the selected sample. The duplicated sample is placed in the All Self-contained Samples and Unassigned Samples folders. Several selected samples can be duplicated in one go. See “Duplicating samples” for more details.
This command is available when one or several samples are selected in the Song Samples location. Select this to export the selected sample to disk. A dialog appears where you can select file format. Several selected samples can be exported in one go. See “Exporting samples” for more details.
This command is available when one or several samples are selected in the Song Samples location. Select this to permanently delete the selected sample(s) from the song. Note that samples from the Factory Soundbank and from ReFills will not be deleted from their original locations - only from the song document. Several selected samples can be deleted in one go. See “Deleting samples from a song” for more details.
This menu command is available when Keyboard Control Edit Mode is selected. It will open a dialog where you can assign a Keyboard Control for a selected parameter. See “Editing Keyboard Control” for more information.
This menu command is available when Keyboard Control Edit Mode is selected. It will remove the Keyboard Control mapping for a selected assigned parameter. See “Editing Keyboard Control” for more information.
This menu command is available when Keyboard Control Edit Mode is selected. It removes all keyboard mapping you have set up for the selected device. See “Editing Keyboard Control” for more information.
This menu command is available when Remote Override Edit Mode has been activated on the Options menu. It opens a dialog where you can assign a Remote Override for the selected parameter. See “Remote Override mapping”.
This menu command is available when Remote Override Edit Mode has been activated on the Options menu. It will remove the Remote Override mapping for a selected assigned parameter. See “Remote Override mapping”.
This menu command is available when Remote Override Edit Mode has been activated on the Options menu. It removes all Remote Override mapping you have set up for the selected device. See “Remote Override mapping”.
If the device you paste into is in the same song as the device you copied from, the operation will replace the existing overrides. See “Remote Override mapping”.
|
•
|
See “Cable appearance” for more details.
Here you can choose from two different visual themes, i.e. how the user interface should be visually presented. The selected theme/color affects the Sequencer, Browser and Transport Panel areas. See “About different Themes”.
It’s possible to specify a certain song document which will automatically open as a “template” each time you select “New” from the File menu. The Default Song could be an empty document, a song you have created earlier, or a factory made Template song. See “Setting up a Default Song” for information on how to select Default Song.
|
•
|
|
•
|
The Sample Rate can be specified on the Audio tab in the Preferences dialog. See “Sample Rate settings for recording and playback” for more details.
The Buffer Size determines the Input and Output Latency of the audio. Generally, the smaller the Buffer Size, the lower the latency. However, too low a Buffer Size setting could result in clicks, pops, dropouts, etc. in the audio. Therefore, the Buffer Size should be set to an “optimal” value rather than to the lowest value. See “Buffer Size settings” for more information.
See “About latency” for more information.
If you are monitoring via an external mixer, and have selected “External” in the “Monitoring” section on the “Audio” page in Preferences (see “Monitoring”), there might be situations where you experience that the recorded audio is generally played back too early - or too late - in the song. This could be because the latency values reported to Reason by the audio card were not completely accurate.
See “Recording Latency Compensation” for information.
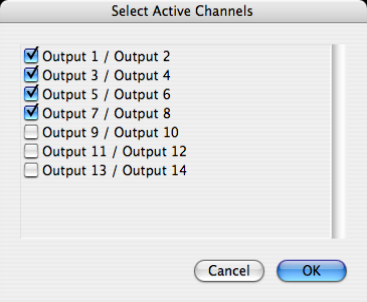
Active inputs and outputs will be also indicated with yellow and green LEDs in the Reason Hardware Interface - see “How Reason communicates with your audio hardware”.
See “Audio Basics” for more information on how Reason handles audio.
The “Render audio using audio card buffer size setting” function should be selected (checked) for best plugin performance. When selected, the audio batches are rendered internally according to the set Buffer size (see “Buffer size” above). For example, if you have a Buffer size of 512 Samples, each audio batch will be 512 samples internally. Raising the Buffer size will let Reason process larger audio batches in one go, which is often more efficient. Many plugins are also more efficient when doing larger audio batches. if you are using DSP-heavy VSTs (mastering effects, for example), these will run a lot smoother with this function selected.
Record enabling of audio tracks is done by clicking the Record Enable button on the track in the track list - see “Record enabling”.
|
|
Note that if you have selected “Standard” in the “Master Keyboard Input” section on the “MIDI” page in Preferences (see “The Master Keyboard Input setting”), selecting an audio track also automatically record enables it - and consequently enables monitoring in “Automatic” mode.
|
The surface designated as Master Keyboard cannot be locked to a specific device - it always follows the sequencer Master Keyboard Input. By selecting the Master Keyboard surface in the Attached Surfaces list and clicking this button allows you use Surface locking, although you will not be able to play the device. See “Locking a surface” in the Remote chapter for details.
See “Automatic set-up using the Easy MIDI Inputs function” for more details.
Please see “Authorizing a computer for long-term off-line use” for more information.
Here you can select the folders you want Reason to scan for VST plugins during each launch. See “Defining custom VST folders” for more information.
Here you can select where you want to locate the Scratch Disk Folder. The Scratch Disk Folder is a temporary storage for recorded audio files before they have been manually saved in a song document file. By default, Reason places the Scratch Disk folder in the system temp folder in your home directory. You can manually change the Scratch Disk folder location if you like. See “Changing Scratch Disk folder location” for more information.
This could be an external hardware sequencer or sequencer software that is installed on the same computer as Reason. See the chapter “Synchronization and Advanced MIDI” for more details.
As part of the MIDI Clock standard there are also options for sending out Start, Stop, Continue and Song Position Pointers, see “Using Reason as MIDI Clock Host”.
See the “Synchronization and Advanced MIDI” chapter for more information.
See “Adjusting for Latency” for more information.
See the “On-screen Piano Keys” chapter for information on how to use the On-screen Piano Keys.
You could then rename the track, device and channel strip afterwards if you like - see “Naming tracks”.
Select this to open the Browser without Browse Focus. In the Browser you can select and load patches, samples etc. and create the corresponding device. See “Using the browser without Browse Focus”.
Depending on what type of device you create, the result can be different. See “Creating devices” for a complete description of what happens when you create different device types.
|
•
|
When this is activated, the program is synchronized to external MIDI Clock, as set up in the Preferences|Advanced dialog. The tempo setting on the Transport Panel is of no relevance; Reason plays in the tempo of the incoming MIDI Clock signals. See “Synchronization and Advanced MIDI” for more details.
When this is activated, the program can be synchronized to other Ableton Link-enabled devices on the same wireless network. See “Synchronization using Ableton Link” for more details.
When this is activated, the program is MIDI Clock Sync host and can control external applications/equipment. See “Synchronization and Advanced MIDI” for more details.
When this is activated, the computer’s keyboard keys can be used to control devices, as set up with the Keyboard Control Edit feature. See “Editing Keyboard Control” for more information.
Each device you select will show a yellow arrow symbol next to every parameter that can be assigned.
|
|
Another way to assign keyboard control commands is to have “Keyboard Control Edit Mode” deselected on the Options menu, and to right-click (Win) or [Ctrl]-click (Mac) the parameter you wish to keyboard control.
|
See “Editing Keyboard Control” for more information.
|
|
Another way to assign keyboard remote commands is to have “Remote Override Edit Mode” deselected on the Options menu, and to simply right-click (Win) or [Ctrl]-click (Mac) the parameter you wish to control.
|
See “Remote Override mapping” for more information.
See “Additional Remote Overrides...” for details.
See the “Locking a surface” for more details.
See “Cable appearance” for information on how to use this function.
A Device Group is a series of interconnected devices that “belong together”. A Device Group could, for example, be an instrument device connected via an effect device to a Mix Channel device. With the “Auto-group Devices and Tracks” option selected, moving/cutting/copying/duplicating and pasting a device in a device group will perform the operation on all devices in the device group. See “Creating devices” for more details.
Select “Delay Compensation” to activate the built-in delay compensation, see “Activating the Delay Compensation”.
Select “Show CPU Load for Devices” to have the devices in the rack display how much CPU they use, see “Checking processing power for individual devices”.
Select if you want to change the zoom level (size) of the entire Reason application. Choose the desired zoom level on the sub-menu, see “Application Zoom”.
See “About drawing notes outside an open clip”, “About moving notes outside or between clips” and “Pasting events outside an open clip” for detailed examples.
Activate this if you want the notes in Note Clips to be reversed graphically instead of musically. See “Reverse” for more details.
This sends an All Notes Off MIDI command on the MIDI Out ports used by Reason. This function can be used if you are experiencing hanging notes when you are controlling external MIDI instruments from Reason. See “MIDI Out Device” for more information about MIDI controlling external equipment.
Selecting this brings up the Manage Plugins window, where you can manage your VST plugins. See “Managing VST plugins”.
Selecting this, or pressing [F4], will show or hide the floating On-screen Piano Keys window. See “On-screen Piano Keys” for information on how to use the On-screen Piano Keys window.
Selecting this, or pressing [F2], will show or hide the Spectrum EQ Window. See “The Spectrum EQ Window” for more information.
Selecting this, or pressing [Ctrl]+[F3], will show or hide the floating Recording Meter Window. See “The Recording Meter Window” for more information.
Selecting this brings up the Missing Sounds window. See “Handling Missing Sounds” for more information.
#Zoom
Selecting this brings up the Manage Plugins window, where you can manage your VST plugins. See “Managing VST plugins”.
Selecting this, or pressing [F4] will show or hide the floating On-screen Piano Keys window. See “On-screen Piano Keys” for information on how to use the On-screen Piano Keys window.
Selecting this, or pressing [F2], will show or hide the Spectrum EQ Window. See “The Spectrum EQ Window” for more information.
Selecting this, or pressing [Cmdl]+[F3], will show or hide the floating Recording Meter Window. See “The Recording Meter Window” for more information.
Selecting this brings up the Missing Sounds window. See “Handling Missing Sounds” for more information.
