This chapter describes the different recording techniques that you can use in Reason. The chapter covers both audio, notes and parameter automation recording. Before you read this chapter, it’s recommended that you are familiar with the basic sequencer functions and definitions described in the “Sequencer Functions” chapter. A lot of functions are common for all types of recording methods. These will be described first in this chapter. Later in the chapter we will go into functions specific to audio, notes and parameter automation recording.
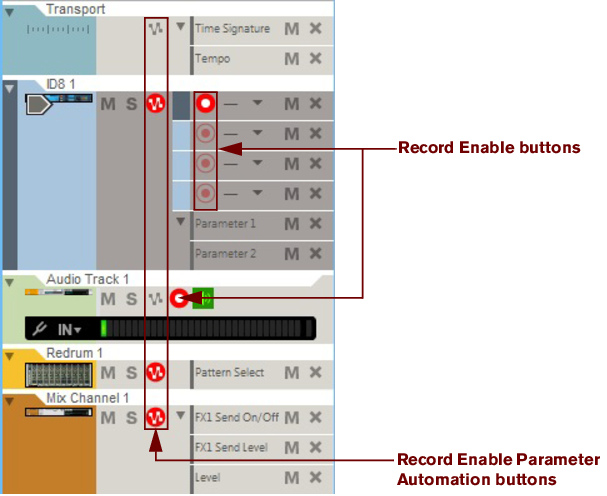
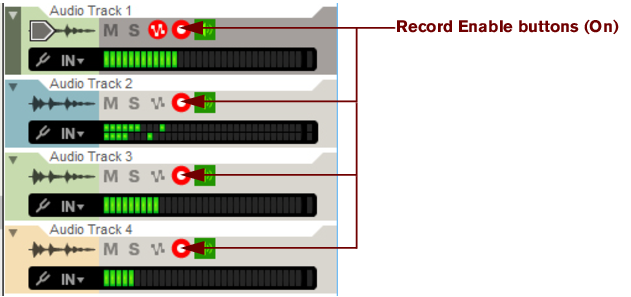
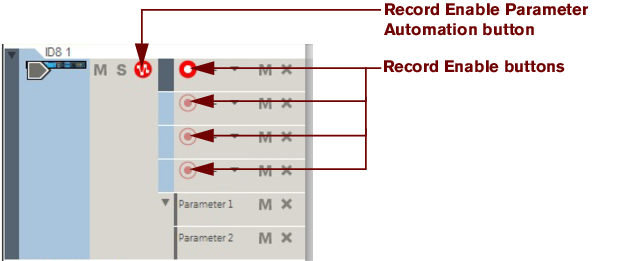
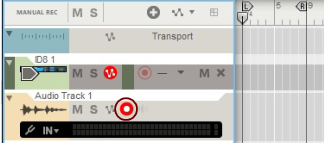
Activated Enable Record and Enable Record Parameter Automation buttons are indicated with a red color. Recording can be simultaneously enabled on an unlimited number of audio tracks (limited only by the computer’s processing and hard disk performance) - plus one note lane on an instrument track. However, if you have locked several MIDI keyboard controllers to specific instrument devices in the rack - using Remote (see “Locking a surface”) - you can record MIDI on these instrument tracks simultaneously. Recording of parameter automation can be simultaneously enabled on as many tracks as you like.
Selecting an audio track will automatically record enable the track if you have selected “Standard” mode in the “Master Keyboard Input” section on the “MIDI” tab in the Preferences dialog (see “The Master Keyboard Input setting”) - and if the Manual Rec button in the Track List is Off, see “About the Manual Rec function”.
Also, depending on the setting in the “Monitoring” section on the “User Interface” tab in Preferences, monitoring of the input signal to the audio track may, or may not, be automatically activated - see “Monitoring”.
If you have selected “Standard” mode in the “Master Keyboard Input” section on the “MIDI” tab in the Preferences dialog (see “The Master Keyboard Input setting”), selecting an instrument track will automatically set Master Keyboard Input to that track - if the Manual Rec button in the Track List is Off, see “About the Manual Rec function”. An instrument track that has Master Keyboard Input will automatically be record enabled, and will also be enabled for parameter automation recording, indicated by the red Record Enable Parameter Automation button.
|
|
Only one note lane on one instrument track can have Record Enable active at a time, unless you have locked additional MIDI keyboard controllers to specific instrument devices in the rack (see “Locking a surface” in the Remote chapter). If you only have one MIDI keyboard controller (assigned as Master Keyboard), you can only record notes on one note lane at a time (see “Setting Master Keyboard Input”).
|
If you have locked additional MIDI keyboard controllers to specific instrument devices in the rack (see “Locking a surface” in the Remote chapter), the corresponding tracks for all these locked devices are automatically record enabled - if the Manual Rec button in the Track List is Off, see “About the Manual Rec function”. These additional record enabled tracks are all displayed with the gray “Master Keyboard Input” symbol to the left of the device icon in the track list, and their Record Enable buttons are also automatically switched on. The track with “normal” Master Keyboard Input is also indicated with the gray Master Keyboard Input symbol to the left of its device icon.
If you change your mind and want to record audio on an audio track, you have to manually record enable it by clicking its Record Enable button as described in “Record enabling an audio track”. Alternatively, switch off the Manual Rec button to enable the automatic record enabling again.
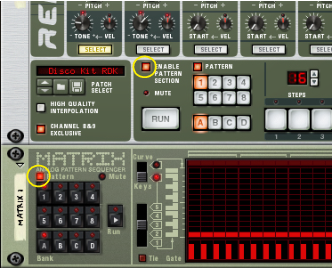
Pattern automation can be recorded on tracks associated with pattern based devices such as the Redrum Drum Module, Dr. Octo Rex Loop Player or Matrix Analog Pattern Sequencer. Enabling pattern automation works in the same way as enabling regular parameter automation (see “Record enabling parameter automation”).
|
|
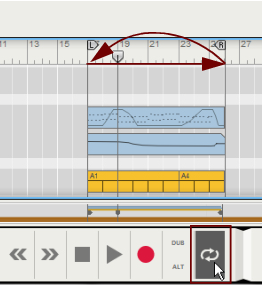
The behavior when recording in loop mode differs depending on what you’re recording - audio, MIDI or parameter automation. Refer to “Recording audio in Loop mode”, “Recording notes in Loop mode” and “Recording parameter automation in Loop mode”.
The following description applies to all types of recording: audio, MIDI and parameter automation. For specific details of audio, MIDI and parameter automation recording, refer to “Recording audio”, “Recording notes”, “Recording performance controller automation” and “Recording parameter automation”.
|
1.
|
|
2.
|
|
|
If you are going to record complex/difficult takes, a good suggestion is to lower the song tempo during recording and then speed up the song to normal tempo again during playback. For audio tracks, Reason features very sophisticated functions for audio stretching. Audio stretch enables you to alter the song tempo up or down without changing the pitch of the recorded audio. See “About tempo changes and tempo automation of audio tracks” for more details.
|
|
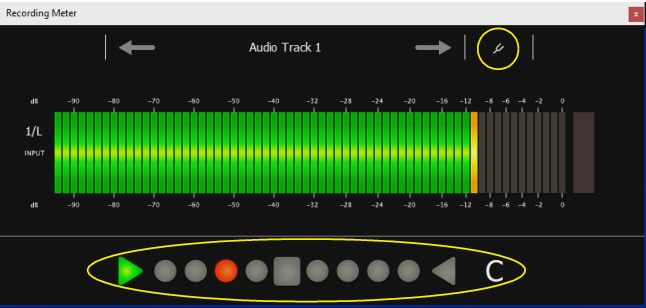
See “Using the Tuner” for more information about the Tuner.
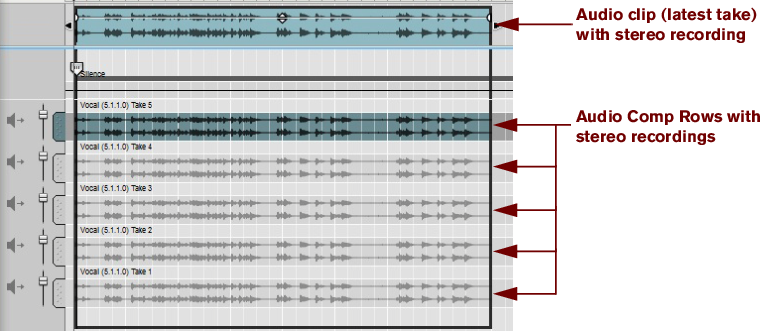
From here, it’s easy to assign the best parts from the different takes and comp them into a final clip. See “Creating a comped audio clip” for details.
This will create a new audio track with a duplicate of the original audio track settings, including the channel strip settings (with insert effects etc.). Now, you can continue recording on the new audio track as described in “Recording audio” and “Recording audio in Loop mode”. Afterwards, you can edit the new track completely independently of the original track.
Closely related to the “Dub” function, described in “Overdubbing audio using the “Dub” function”, is the “Alt” function. This function can be used to create a new audio track with an identical copy of the selected audio track’s settings. The only difference between the “Alt” and “Dub” functions is that the Alt function will automatically mute the original audio track.
This will create a new audio track with a duplicate of the original audio track settings, including the channel strip settings (with insert etc.). Now, you can continue recording on the new audio track as described in “Recording audio” and “Recording audio in Loop mode”. Afterwards, you can edit the new track completely independently of the original track.
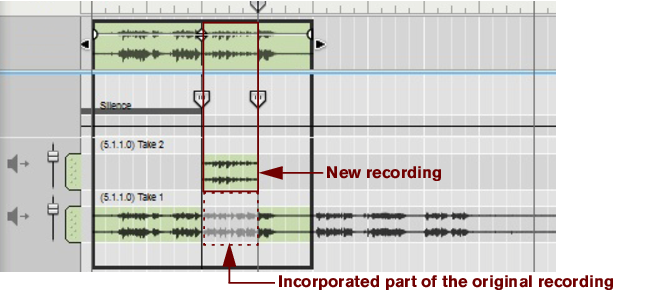
If you start recording over an existing clip on an audio track, the new recording will incorporate (replace, but not erase) the previous recording in the clip. When you open the audio clip in the Comp Editor afterwards, there will be one Comp Row for each of the takes, the same result as when recording audio in Loop mode (see “Recording audio in Loop mode”).
See “Creating a comped audio clip” for details on how to extract parts from individual takes and comp into a final clip.
You might have the individual drums of your drum kit on separate tracks and these tracks are routed to a Mix Channel which is set to work as an Output Bus (see “Output Busses”). You then want to record the audio from the Output Bus onto a new Audio Track.
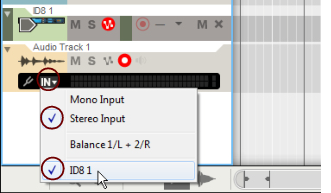
In this situation, all you need to do is create a new Audio Track, activate the Rec Source button on the Output Bus Mix Channel device, and then select the Output Bus in the Select Audio Input drop-down list on the Audio Track in the Track List. Then, record the audio from the Output Bus as described in “Recording audio”.
|
|
|
1.
|
Note events can be recorded for instrument devices and are contained in note clips. Performance controller events, such as Mod Wheel, Pitch Bend and Aftertouch events, can also be recorded for instrument devices, and be contained in note clips, but they are described separately in “Parameter automation recording details”.
To record notes for an instrument device - or for an external MIDI instrument - on a track in the sequencer, you need only create an instrument track as described in “Creating an instrument track”. The instrument track will automatically have Master Keyboard Input and the note lane will automatically be record enabled. Since you will only be recording MIDI events on the instrument track - and no audio - there is no need to adjust audio levels etc. These can always be adjusted afterwards.
If you want to control an external MIDI instrument, simply create a MIDI Out Device and select the appropriate MIDI port and channel on the device panel. See “MIDI Out Device” for more details.
It’s possible to quantize MIDI notes as they are being recorded. This will automatically align the start positions of the recorded notes to a pre-defined grid. Refer to “Quantize” for more details.
|
|
|
|
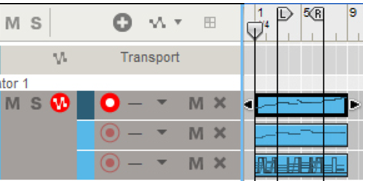
Recording over or into an existing note clip will simply add new note events to the previously recorded events in the note clip as described in “Recording notes in Loop mode”. However, If the new recording should start before the original clip, and expand into the original clip, a new clip will be created and will engulf the original clip. Let’s have a look at the following example:
|
|
|
|
Another, perhaps more convenient, way of overdubbing on an instrument track is to create additional note lanes and record new clips on these using the New Dub or New Alt functions described in “Recording notes using the “Dub” and “Alt” functions”. This way, you will get a better overview of exactly what you added in each of your recordings.
|
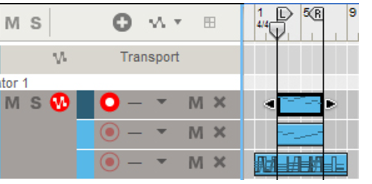
When using the “Alt” function in Loop mode, the clips between the locators will be muted - not the entire note lane. If the locators are placed over an existing clip, as in the example above, clicking the “Alt” button in Loop mode will split the clip and mute the clip between the locators.
In Reason, you can automate virtually any device and channel strip parameters and create completely automated mixes if you like. This is done by recording parameter events in the sequencer. It’s also possible to record sequencer Tempo automation (see “Tempo automation recording”).
The key feature with performance controller automation is that it’s contained together with the notes in the note clip. Moving the note clip moves the performance controller automation as well. Therefore, if your controller changes are part of your "note performance" (e.g. Pitch Bend and Sustain Pedal), then you want them as performance controllers (see “Recording performance controller automation”).
Filter sweeps played together with the notes etc. can also be recorded as performance controllers (see “Recording parameter automation into Note Clips”).
Track parameter automation is recorded on separate lanes on the track (one lane for each automatable parameter). Track parameter automation clips can be moved individually, independent from any note clips. See “Recording parameter automation”.
|
|
|
|
|
|
|
2.
|
While recording on a note lane according to the description in “Recording notes”, tweak the parameter(s) you want to automate on the instrument device panel in the rack - or use a Remote MIDI controller (see “Remote - Playing and Controlling Devices”).
|
However, if the new recording should start before the original clip’s start position, a new clip will be created which will incorporate the original clip. The new automation data will replace the existing one, but any existing note events will not be affected (see “Recording parameter automation over or into an existing clip” and “Recording over or into an existing note clip”).
Parameter automation is the standard way to automate device and channel strip parameters. Each automated device/channel strip parameter will generate a separate automation lane on the track. It’s also possible to record automation of the Tempo on the Transport Panel. This is described in detail in “Tempo automation recording”.
|
|
You can change the static value at any time, by opening the automation clip in the Edit Area (Performance Controller only). See “Editing parameter automation in the Edit Area”. Static Values for regular Track Parameter Automation can be edited on the Parameter Automation Lane.
|
|
1.
|
|
2.
|
|
|
|
|
Recording parameter automation events in Loop mode works similar to “non-looped” recording (see “Recording parameter automation”), except that for every new loop cycle any changed parameter value will replace the previously recorded value for the corresponding parameter.
|
1.
|
|
|
When recording is activated, all automation record enabled tracks will record track parameter changes from their respective devices in the rack. This is especially useful if you have assigned parameters on several devices to a single control on a MIDI control surface, or have multiple control surfaces controlling different devices in the rack while you’re recording. See “Remote - Playing and Controlling Devices” for details.
When you record and edit any parameters on the device panel, the automation will be included inside the note clip. To edit the automation you will have to open the note clip in the Edit Area and then select the corresponding automation lane using the Controller selector, see “Editing parameter automation in the Edit Area”.
You can move pattern changes to other positions by moving or resizing the pattern clips, see “Editing pattern automation”.
|
•
|
This allows you to create unlimited variations by later editing the notes in Edit mode. See “The “Convert Pattern Automation to Notes” function”.
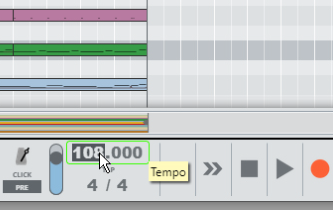
Automating tempo is done much in the same way as with other parameter automation. You record the tempo changes by changing the Tempo value on the Transport Panel. When you later play back, audio clips will automatically be stretched to follow the tempo changes (unless you have disabled stretch for the clips - see “About disabling Stretch for audio clips”). Note clips and automation clips will always follow tempo changes.
